 St. Patrick’s Day is coming up, and it’s a holiday full of many great Irish traditions and cultural sentiments. And where there are traditions, there will be food and drinks to carry them out, from cabbage and corned beef to green beer and whiskey! Why not celebrate St. Paddy’s Day in a healthy way this year by growing some microgreens? Many of us dislike cabbage, but replacing them with microgreens is a great way to get some tangy flavor and crunch packed with nutrition.
Microgreens have been trendy as a superfood or ‘gourmet’ food, and have been all over the news lately. Put simply, microgreens are small greens from young vegetable and herb plants. Microgreens are seedlings of edible vegetables and herbs, harvested before they mature when they’re only a few inches tall.
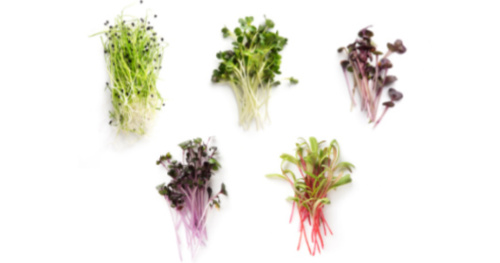
Microgreens are available for a variety of plants and are pretty simple to grow. Some common microgreens come from basil, arugula, radishes, carrots, cilantro, broccoli, celery, cabbage, peas, and wheatgrass. Since microgreens sprout from many vegetables and herbs, so they come in a rich variety of colors, shapes, textures, and flavors.
As their name suggests, these leafy greens are tiny in size, but they deliver many nutrients without the time, space, and fertilizer demands that full-grown crops have. Join me as I share what the hype surrounding microgreens is all about. Learn about their many benefits, as well as how to grow microgreens in your own home!
Benefits of Microgreens
Microgreens are the perfect antidote to all those Christmas goodies you indulged in last month! Researchers have found that microgreens pack a more robust nutritious punch than their mature counterparts. According to a 2012 study by the University of Maryland College of Agriculture and Natural Resources and the U.S. Department of Agriculture, researchers found that microgreens contain four to 40 times more nutrients and antioxidants than matured greens.
The various microgreen species contain omega-3 fatty acids, vitamins (like A, C, E, and K), glucosinolates, polyphenols, minerals, and fibers. Many microgreens, especially broccoli, contain high levels of sulforaphane has been shown to deter the growth of cancer cells. Microgreens are considered a prebiotic, feeding good bacteria into the gut.
Beyond providing stable nutrition, microgreens offer a colorful and flavorful topper to your dish and add to the overall dinner aesthetic. These gourmet greens often garnish the plates of diners at high-end restaurants. So they’re great if you want to add a little punch of flavor to your lunch or dinner!
Microgreens can be used as a stable nutrition source year-round, no matter the setting. They can thrive in challenging environmental conditions using simple tools available in most kitchens. I grow my microgreens indoors under artificial light, but you could also use natural light if you have enough of it.
Microgreens are ready to harvest just a week or two after germination. That’s much less time than full vegetables; this short growth time means you can easily grow them at your home and mix them together. You’re able to harvest microgreens right in your kitchen at the time when you are consuming them. These fresh veggies have a short growth cycle of just six to 28 days from sowing to harvest time. They can also be grown in soil or soilless systems and with or without fertilizers.
According to a research paper led by The Pennsylvania State University, microgreens may be an efficient resource for people living in food deserts or those experiencing food supply chain disruptions due to the pandemic. The study found that these little greens may play an important role in nutritional security as the climate changes and during emergency situations.
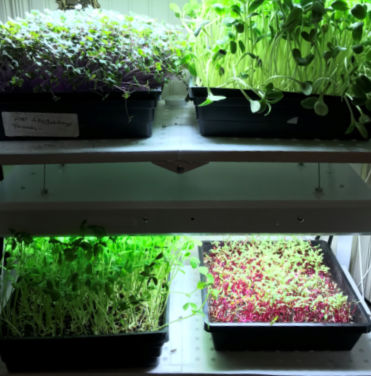
My microgreen growing area!
These tiny yet mighty “microgreens” can flourish in small indoor spaces and soilless production systems with or without artificial light, according to a study published in Acta Horticulturae, the journal of the International Society for Horticultural Science. Microgreens provide a fresh and nutritious source of vegetables even in areas that are considered food deserts.
“The current COVID-19 pandemic revealed the vulnerability of our food system and the need to address malnutrition issues and nutrition-security inequality, which could be exacerbated by potential future emergencies or catastrophes,” lead author Francesco Di Gioia, an assistant professor at Penn State University, said in a press statement. “Nutrient-dense microgreens have great potential as an efficient food-resilience resource.”
How to Grow Your Own Microgreens
Keep reading for a simple, step-by-step guide on how to grow microgreens indoors in your own home. They make every dish better. I suggest adding them to things you are already making, like sandwiches, soups, salads, wraps, or even smoothies. They’re not only highly nutritious- they are very flavorful too!
The supplies you’ll need to grow microgreens include a glass or ceramic container with a lid, a grow mat/pad made of hemp, coconut, or another natural fiber, sprouting seeds, water, and a light source.
You’ll need to use a container or pot that is at least two inches deep. If you’re growing microgreens indoors using natural light, a south-facing window is best. However, an east- or west-facing window will work as well.
You can learn how to grow tasty, nutrient-dense microgreens in just a few easy steps. In a nutshell, here is a six-step process on how to grow your own microgreens:
- Soak the seeds for six to eight hours, or according to the directions on the package.
- Soak the growing mat with water, and place it in a container.
- Spread out the seeds so that they are about 1/8 to 1/4 inch apart.
- Cover and place near a window (or artificial light) until the seeds sprout.
- Remove the lid, and let your greens grow until vibrant leaves appear.
- Continue watering daily. Once the sprouts take root, you can water generously and pour out the extra water. The sprouts will adhere to the mat.
You can find microgreen growing kits online at affordable prices. This low-fuss growing kit comes with non-GMO seed quilts that need watering just once: Hamana Home Microgreens Growing Kit. And The Simply Good Box by Home Greens features four varieties of non-GMO seed for microgreens, including pea shoots, radish, sunflower, and wheatgrass.
When the seedlings are one to three inches tall (depending on the variety you choose), your yummy microgreens are ready for harvesting! I use scissors to cut the greens at their stems just above the soil when I’m about to put them on the plate.
Growing microgreens is really very simple and easy! It’s such a joyful thing to do in winter when we all could use a little pick-me-up. I encourage you to give them a try and enjoy all the flavor and health benefits they bring.
Editor’s Note: This article was originally published on January 15, 2022, and has since been updated.